Creating Custom Objects with Material Editor
You can select one of the standard objects in the Placez Model Libraries and edit its color, texture and material so that it more accurately resembles your own custom objects.
-
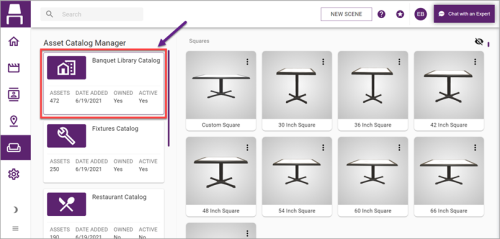
Click/tap the Model Libraries button
 , located on your screen’s vertical, left panel.
Result: The Asset Catalog Manager screen opens. -
Along the left side of the screen, click/tap the Asset Catalog containing the item you want to modify.
-
Click/tap the three dots button
 , located on the top right corner of the item.
Result: Two buttons, Customize and Hide
  , become visible on the item's image.
 -
Click/tap the Customize button
on the item to modify.
Result: The Material Editor Wizard pops up.
-
Select and object in the Model Libraries and access the Material Editor as shown in the section above.
-
Click/tap the Artist Palette button
 , located in the upper right of the Material Editor Wizard, if it is not already selected.
Result: The Material Editor panel opens with item’s Material Selections displaying.
-
Click/tap the color swatch (circle) that represents the specific Material Selection you wish to edit.
Result: A list of editing options appears below the material circles on the screen.
Note: The color of each circle should reflect the color of a particular material available for editing. In the image above, for example, you'd select the black circle to edit the table stem and border and the gray circle to edit the tabletop itself. -
To change the stain of the selected material, scroll down and click/tap the desired color selection.
Result: The color of the selected material’s stain changes to the color selection.
Note: To enter a custom color, click/tap the slider to the right of Advanced Settings (above the default color selection list) and choose a specific color or click the small up or down arrows the right of the HEX field to enter HEX, RGBA or HSLA values.
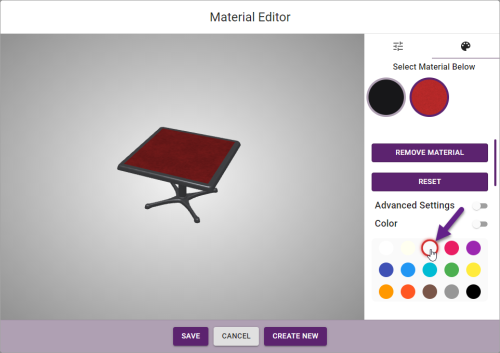
-
See the following sections to make additional adjustments or to save this as a new, custom object.
-
Edit the color of an object's material as shown in the two sections above or change the material completely as shown in the section below.
-
Click/tap the slider
to the right of Advanced Settings (above the default color selection list) .
Result: A list of advanced setting options appears, as shown below. -
Edit the following advanced material settings.
Note: You may need to scroll up or down on the screen to see some settings.-
Custom Colors
You can choose any custom color from the color swatch window or enter a custom HEX, RGBA OR HSLA value (click the small up or down arrows to the right of HEX to enter alternate numbers). -
Transparent
Slide to the right to make the color or material you have chosen more transparent. -
Metalness
Slide to the right to make the chosen material more metallic. -
Roughness
Slide to the left to bring out the color more and make the material less rough. -
Scale
When using special materials (see section below), slide left or right to make the materials - such as marble tiles, texture on fabric, etc. - larger or smaller. (Scale has little effect on simple color changes.)
-
-
See section below to save this as a new custom object.
-
Select an object in the Model Libraries and access the Material Editor as shown in the first section above.
-
Select the specific material you want to edit as described in the second section above.
-
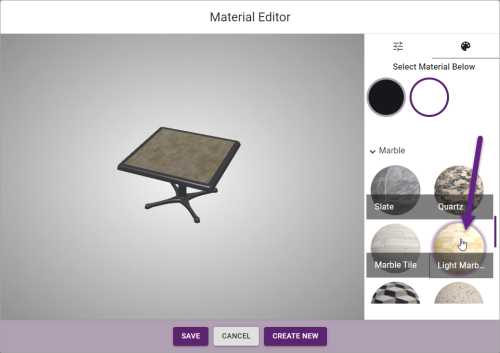
Scroll past the default list of color selections on the Material Editor window to the list of Materials. By default, choices are grouped by category (Brick, Concrete, Carpet, etc.).
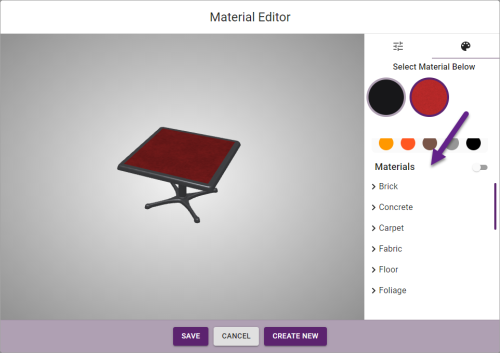
-
Click the arrow next to any material category and choose a new material for the object.
-
Adjust the color and texture of the new material as described in the section directly above.
-
See section below to save this as a new custom object.
-
Edit a standard object as desired using the steps in the sections above.
-
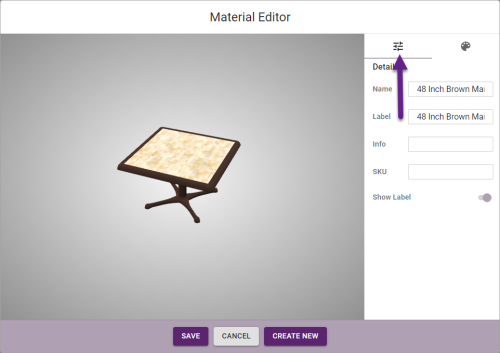
Click the Details tab at the top right of the Material Editor window.
-
Enter a unique Name for the new object.
-
[Optional] Enter a unique Label for the item to be displayed when labels are viewed in a layout. (See Viewing General Details in a Layout.)
-
[Optional] Enter details in the Info field to be displayed when info is viewed in a layout. (See Viewing General Details in a Layout.)
-
[Optional] Enter a SKU for the object. This number is for reference only and is only displayed in a layout when the specific item is selected.
See Also